Comparing HDR RAW capture on Lightroom, Halide, and Obscura
I love to shoot photos in RAW on my iPhone. The stock camera app does some excellent magic to get incredible photos, but in some cases I really just want to be old school and get a ton of image data and process things how I want.
One of the situations where I appreciate RAW the most is when taking photos with a large range of brightness in the shot. When shooting in the stock camera app, iOS will take a number of photos at different exposures and stitch them together to get an image it thinks looks good, and normally it does. But when you shoot RAW, you get a lot more data in the bright and dark sections of an image so you can boost of lower them without introducing grain or distortion to the image. Basically, you have control, not the computer. Maybe I’m old school, but I like that sometimes.
Below are 4 camera apps (stock Camera, Adoble Lightroom, Halide, and Obscurs 2) taking the same photo. It’s early morning, my living room has no lights on, and it’s bright outside. Let’s see how they all do.
Apple Camera.app
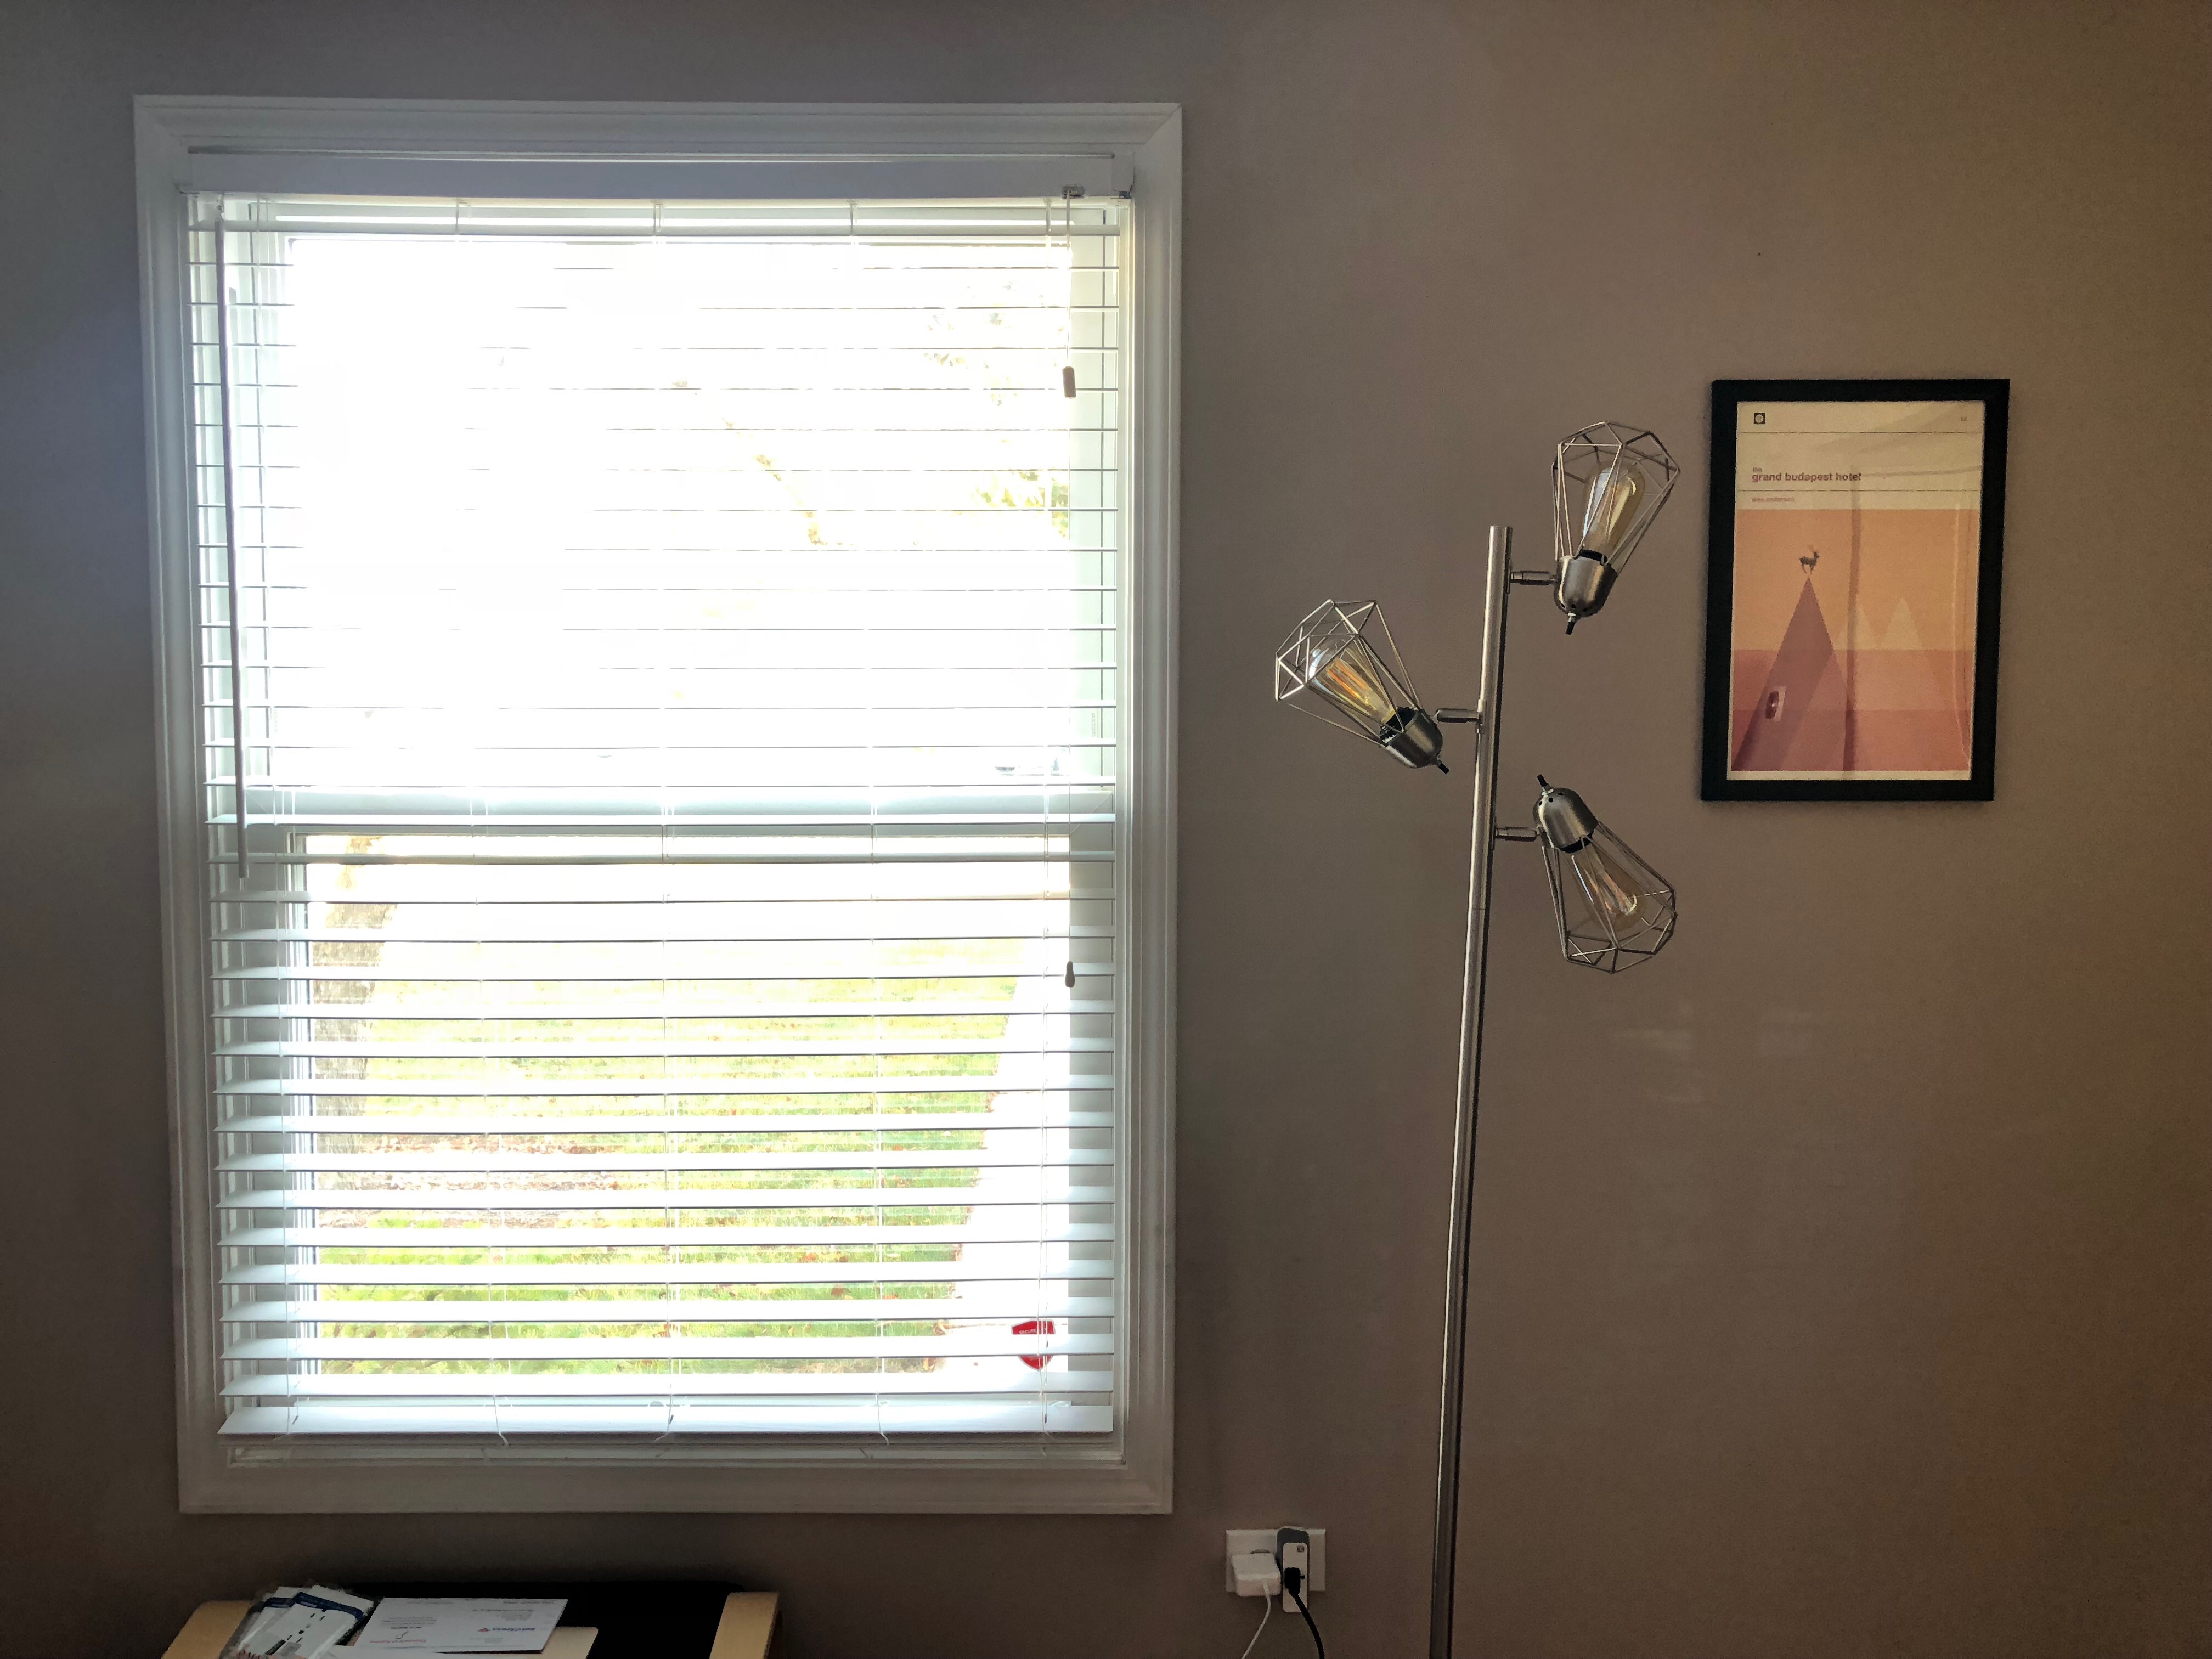
This was a big disappointment, as the iPhone 8 Plus really took a bad picture here. Even with HDR, everything outside the window is blown out. Meanwhile, the interior is quite grainy.
Again, the disadvantage of shooting in this format is that I’m basically stuck with what the camera spits out. It throws away a lot of image data to keep the file size smaller, so only minor edits can be made if I don’t like the decisions Apple’s app made.
So let’s shoot this in RAW and see what happens.
Adobe Lightroom
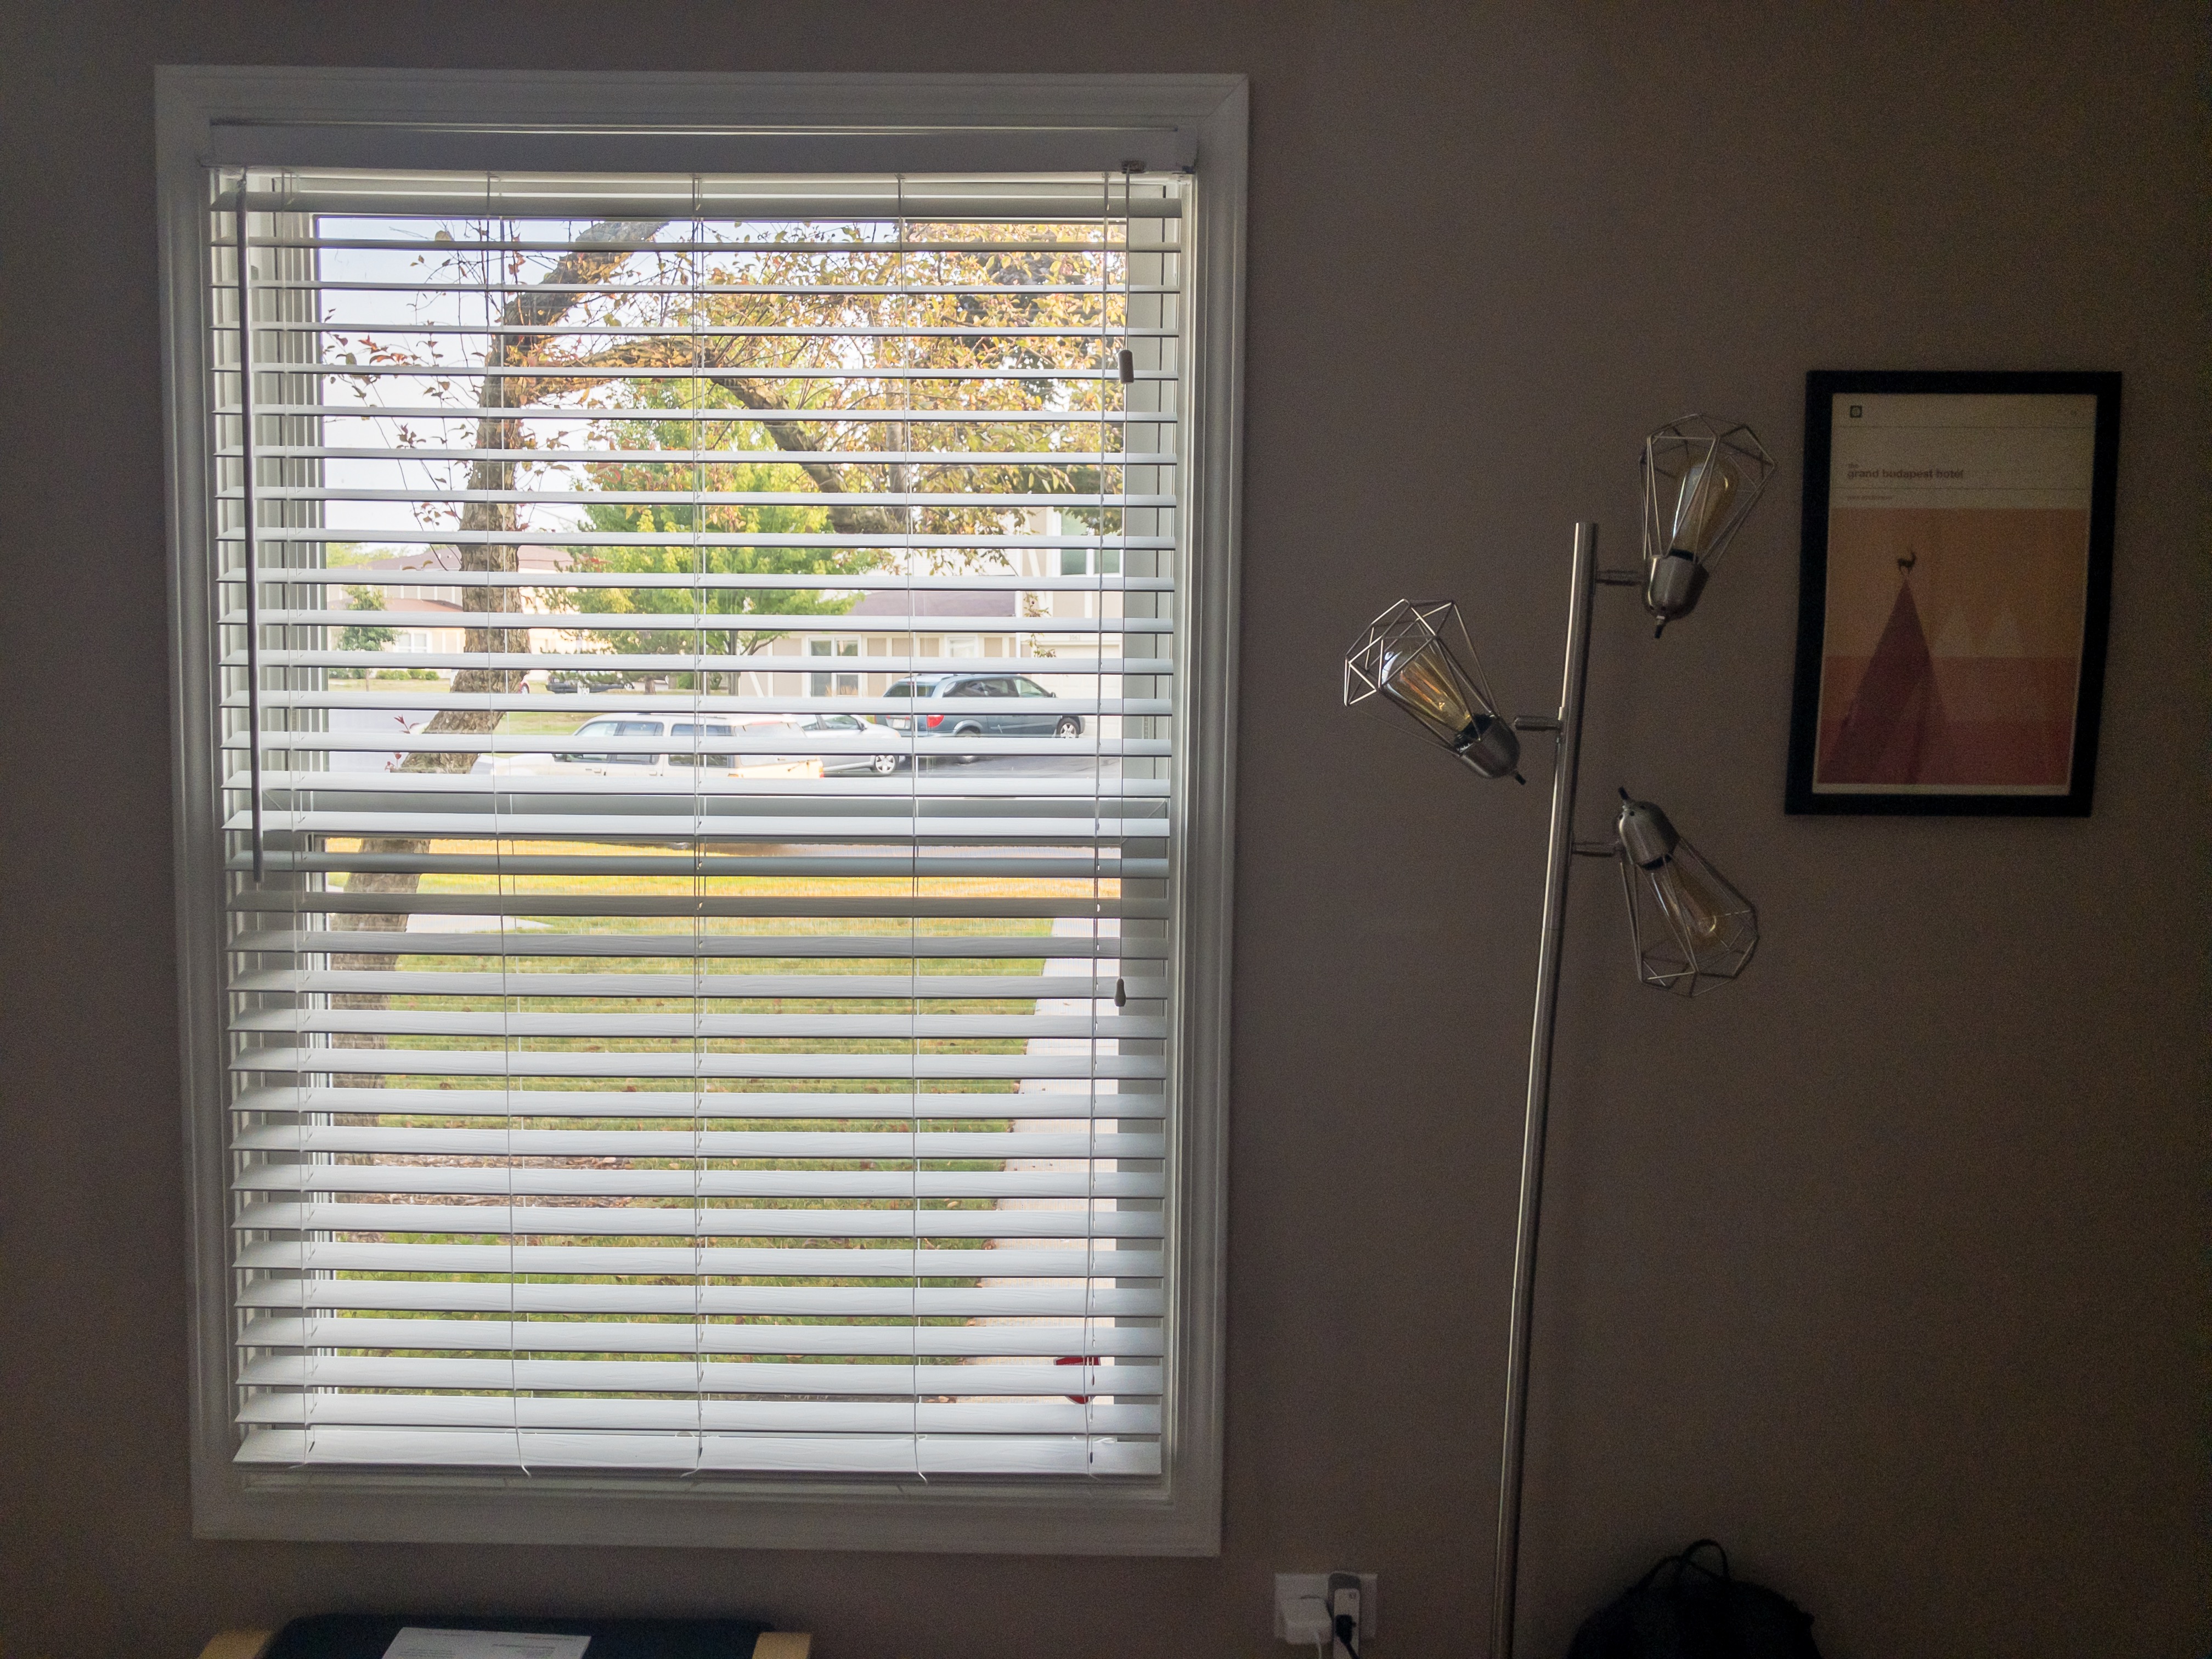
Lightroom is my go-to RAW camera app for iOS, in part because I pay for Creative Cloud and want to get my money’s worth, bot more so because I think it gets the best photos of any app I’ve tried before.
The difference between this image and what the stock camera app produced is night and day. This is a much more satisfying shot with little noise, good color, properly exposed highlights, and zero artifacts.
Also, and this will be true for the other 2 camera apps too, because this is RAW I can further modify this shot to be brighter, darker, have more/less contrast, and a whole host of other changes without degrading image quality. This simply isn’t as possible with a JPEG/HEIC image.
Halide
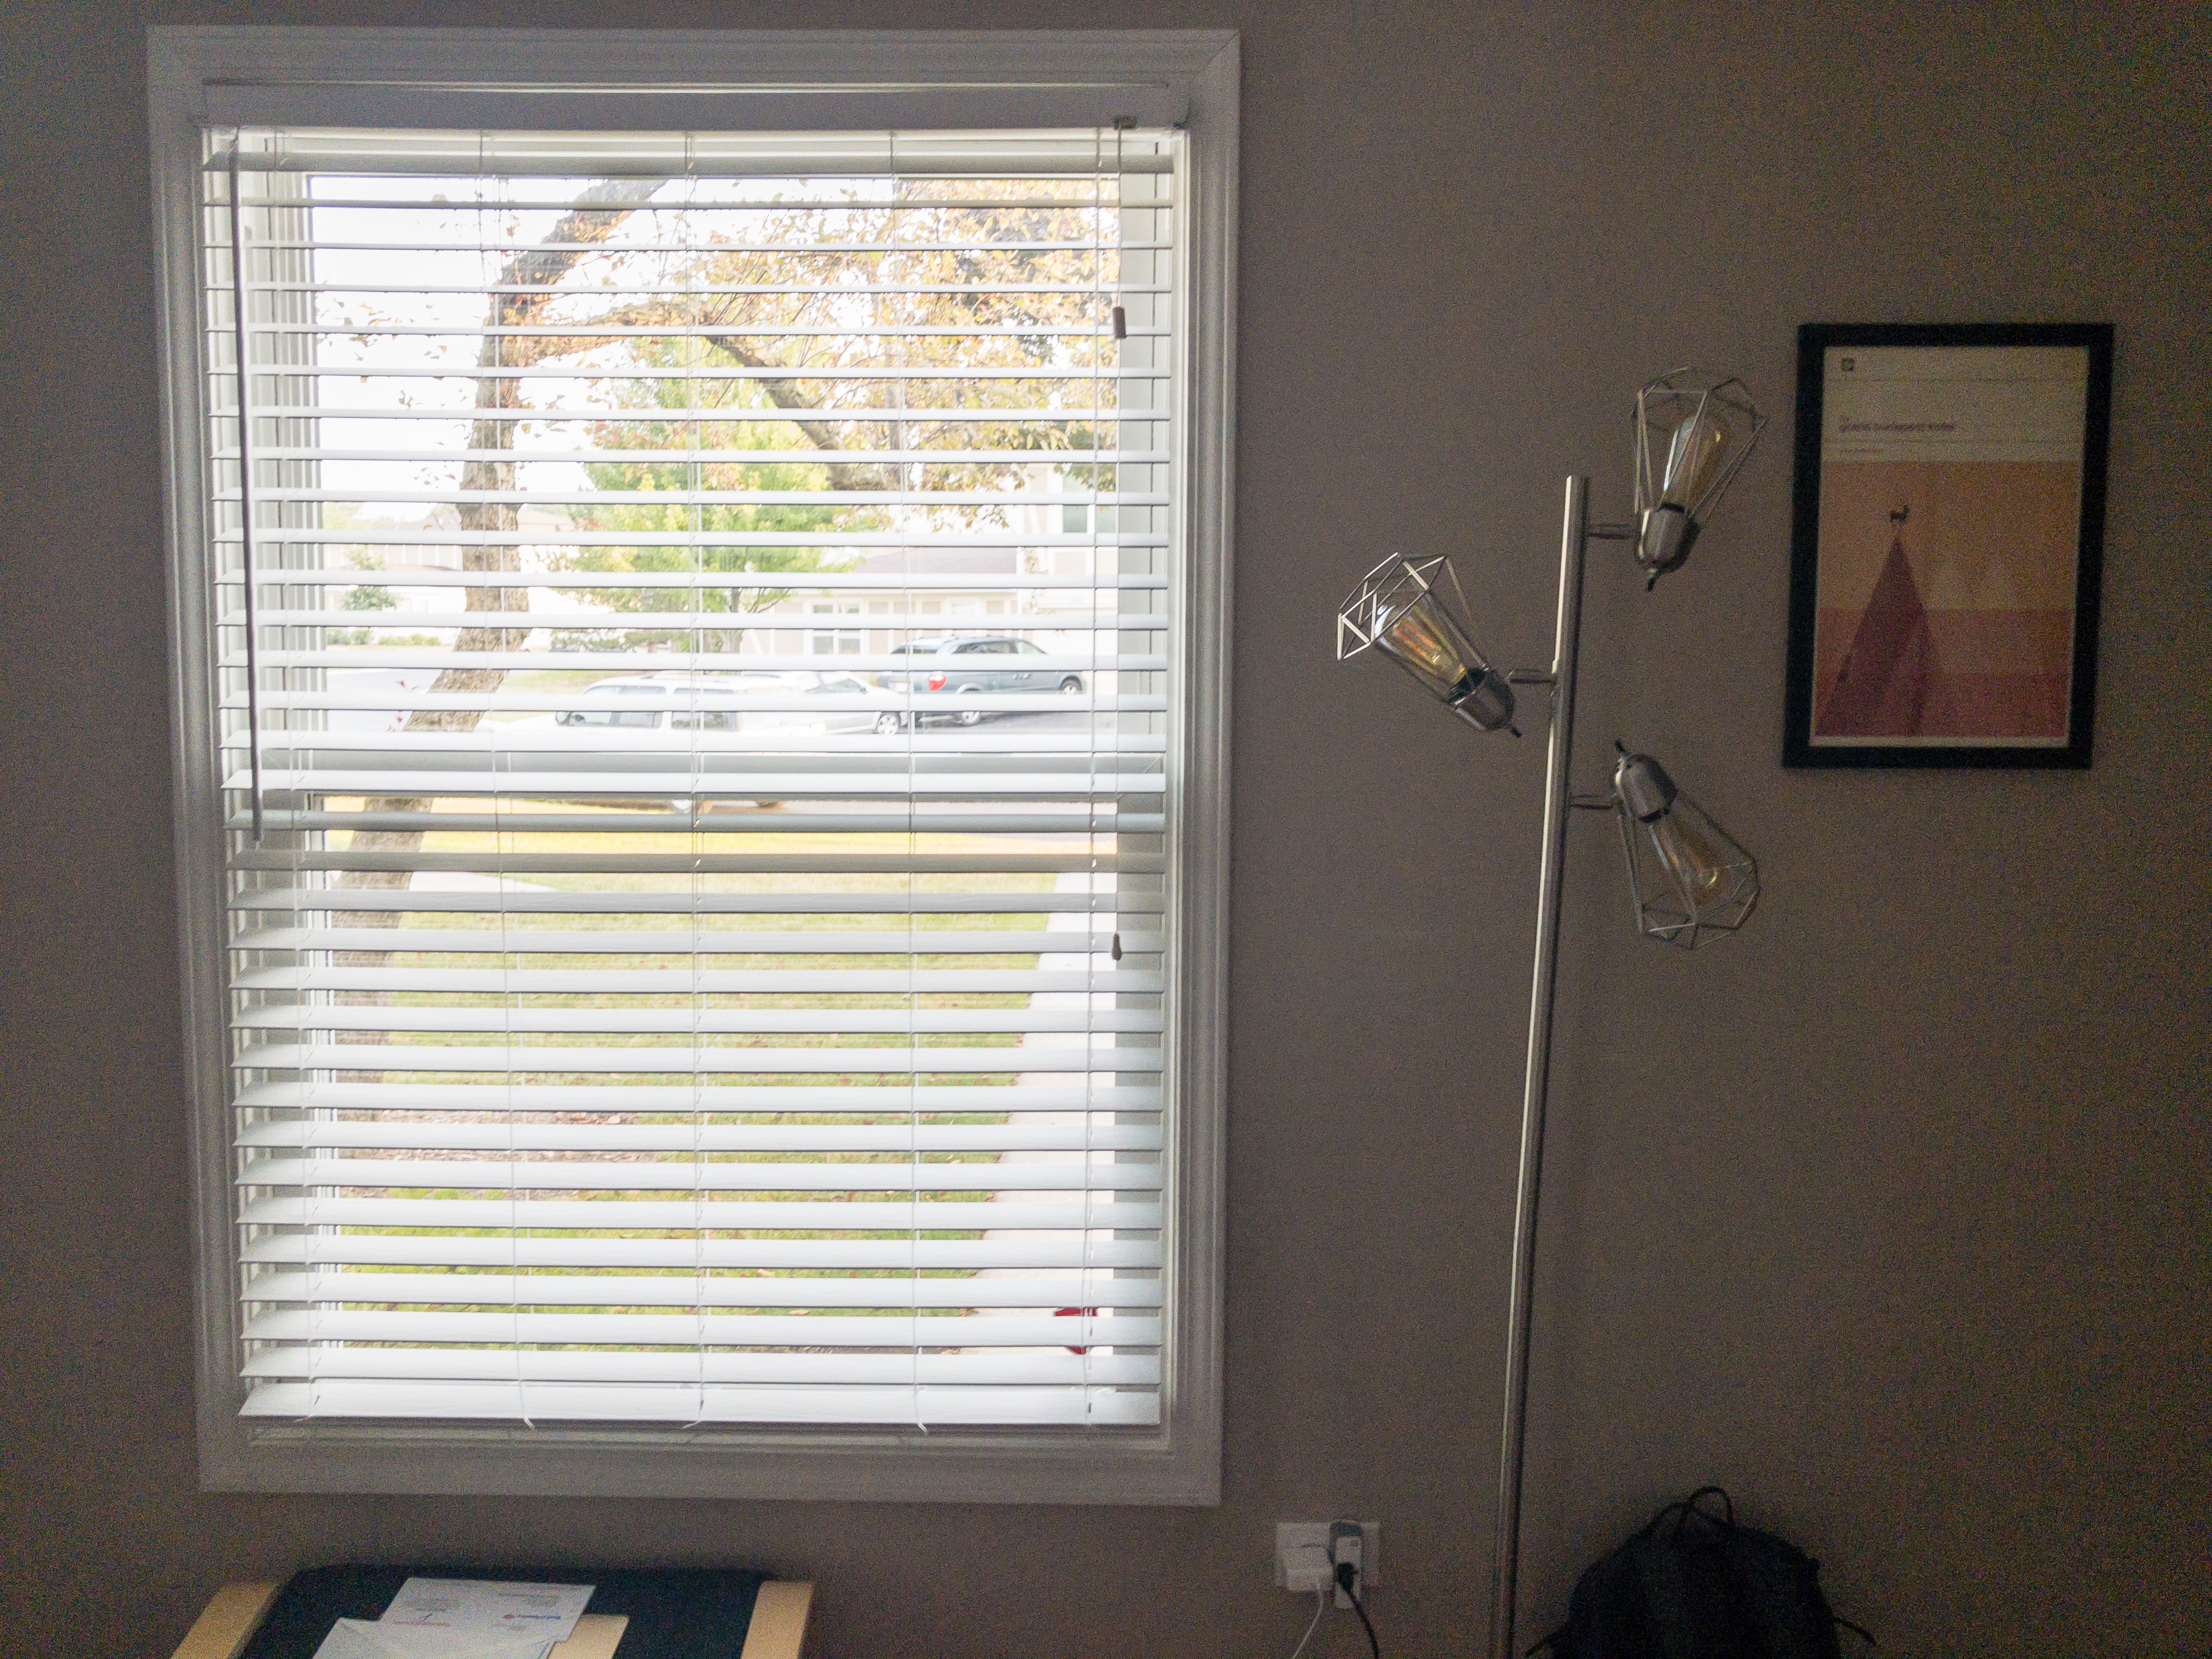
Similar to Lightroom, this image looks better than what the stock camera app produced, but not by as much. I got a lot of grain in the dark areas and wasn’t able to reduce the noise enough without also blurring out the whole photo. So better, but not quite as nice as Lightroom.
Obscura 2
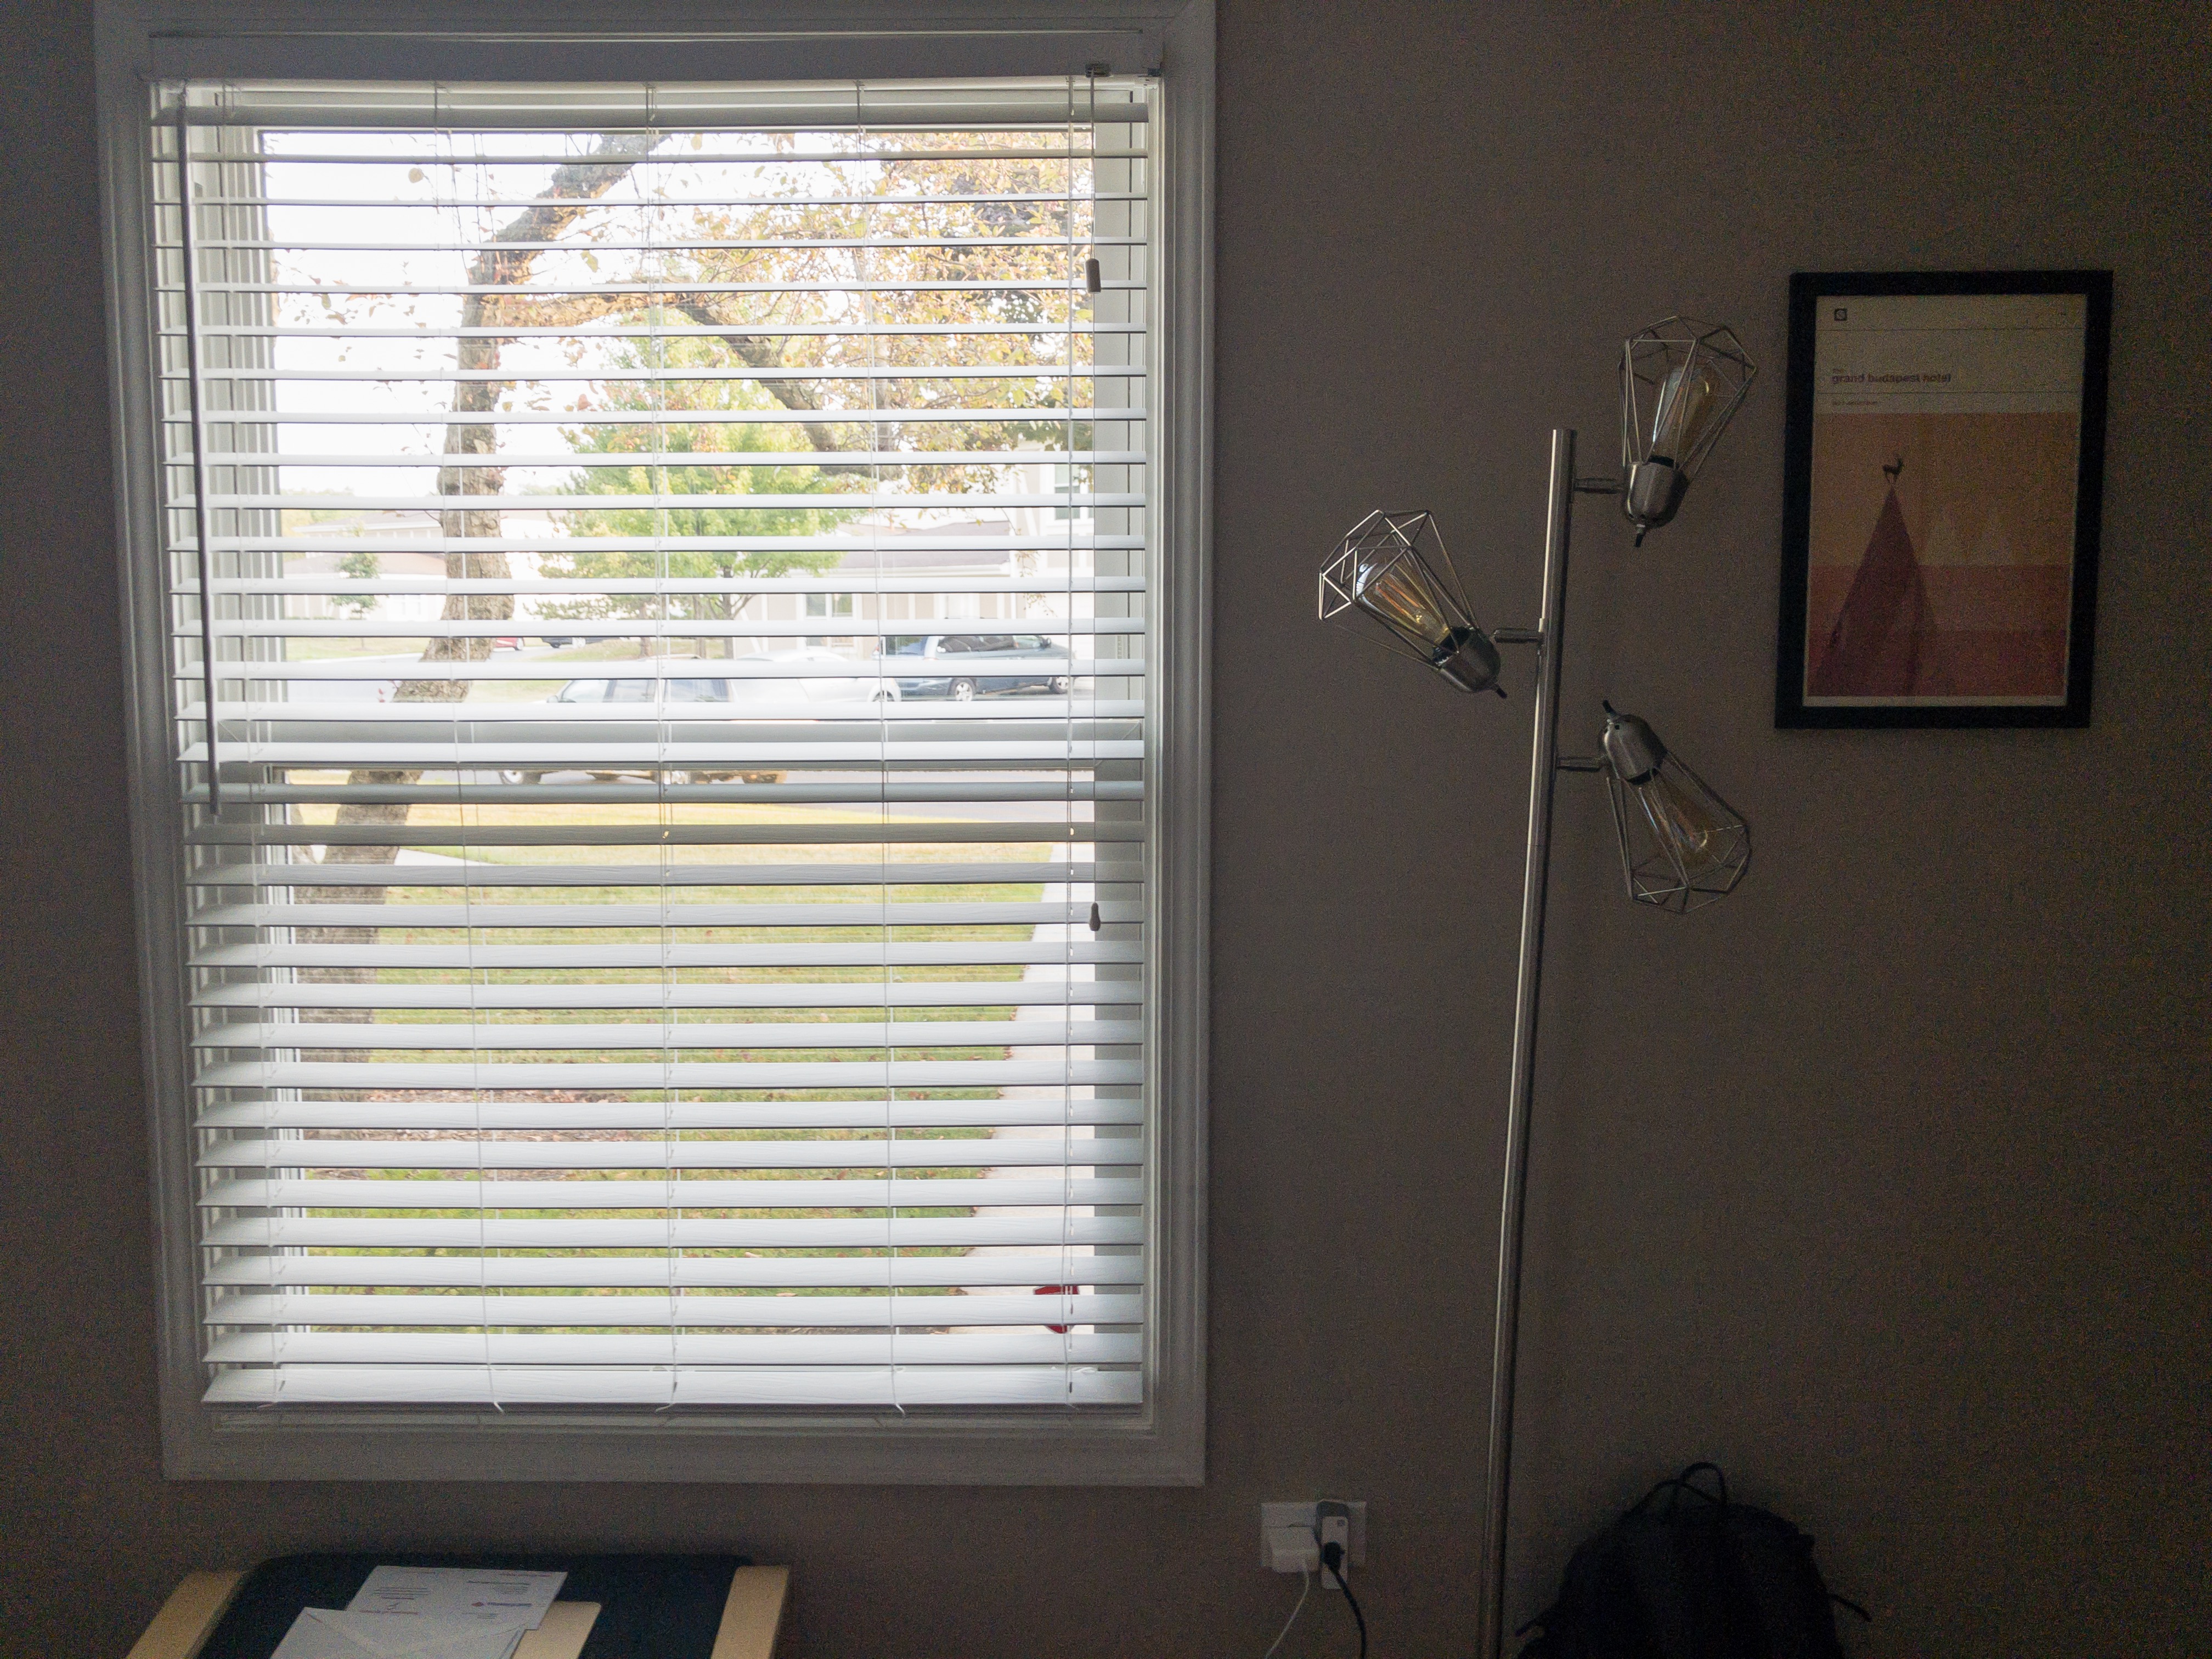
This one was shockingly similar to the Halide image, and has basically the same result: better than Apple’s app, but not as clear as Lightroom.
Surprise! Pixel 2
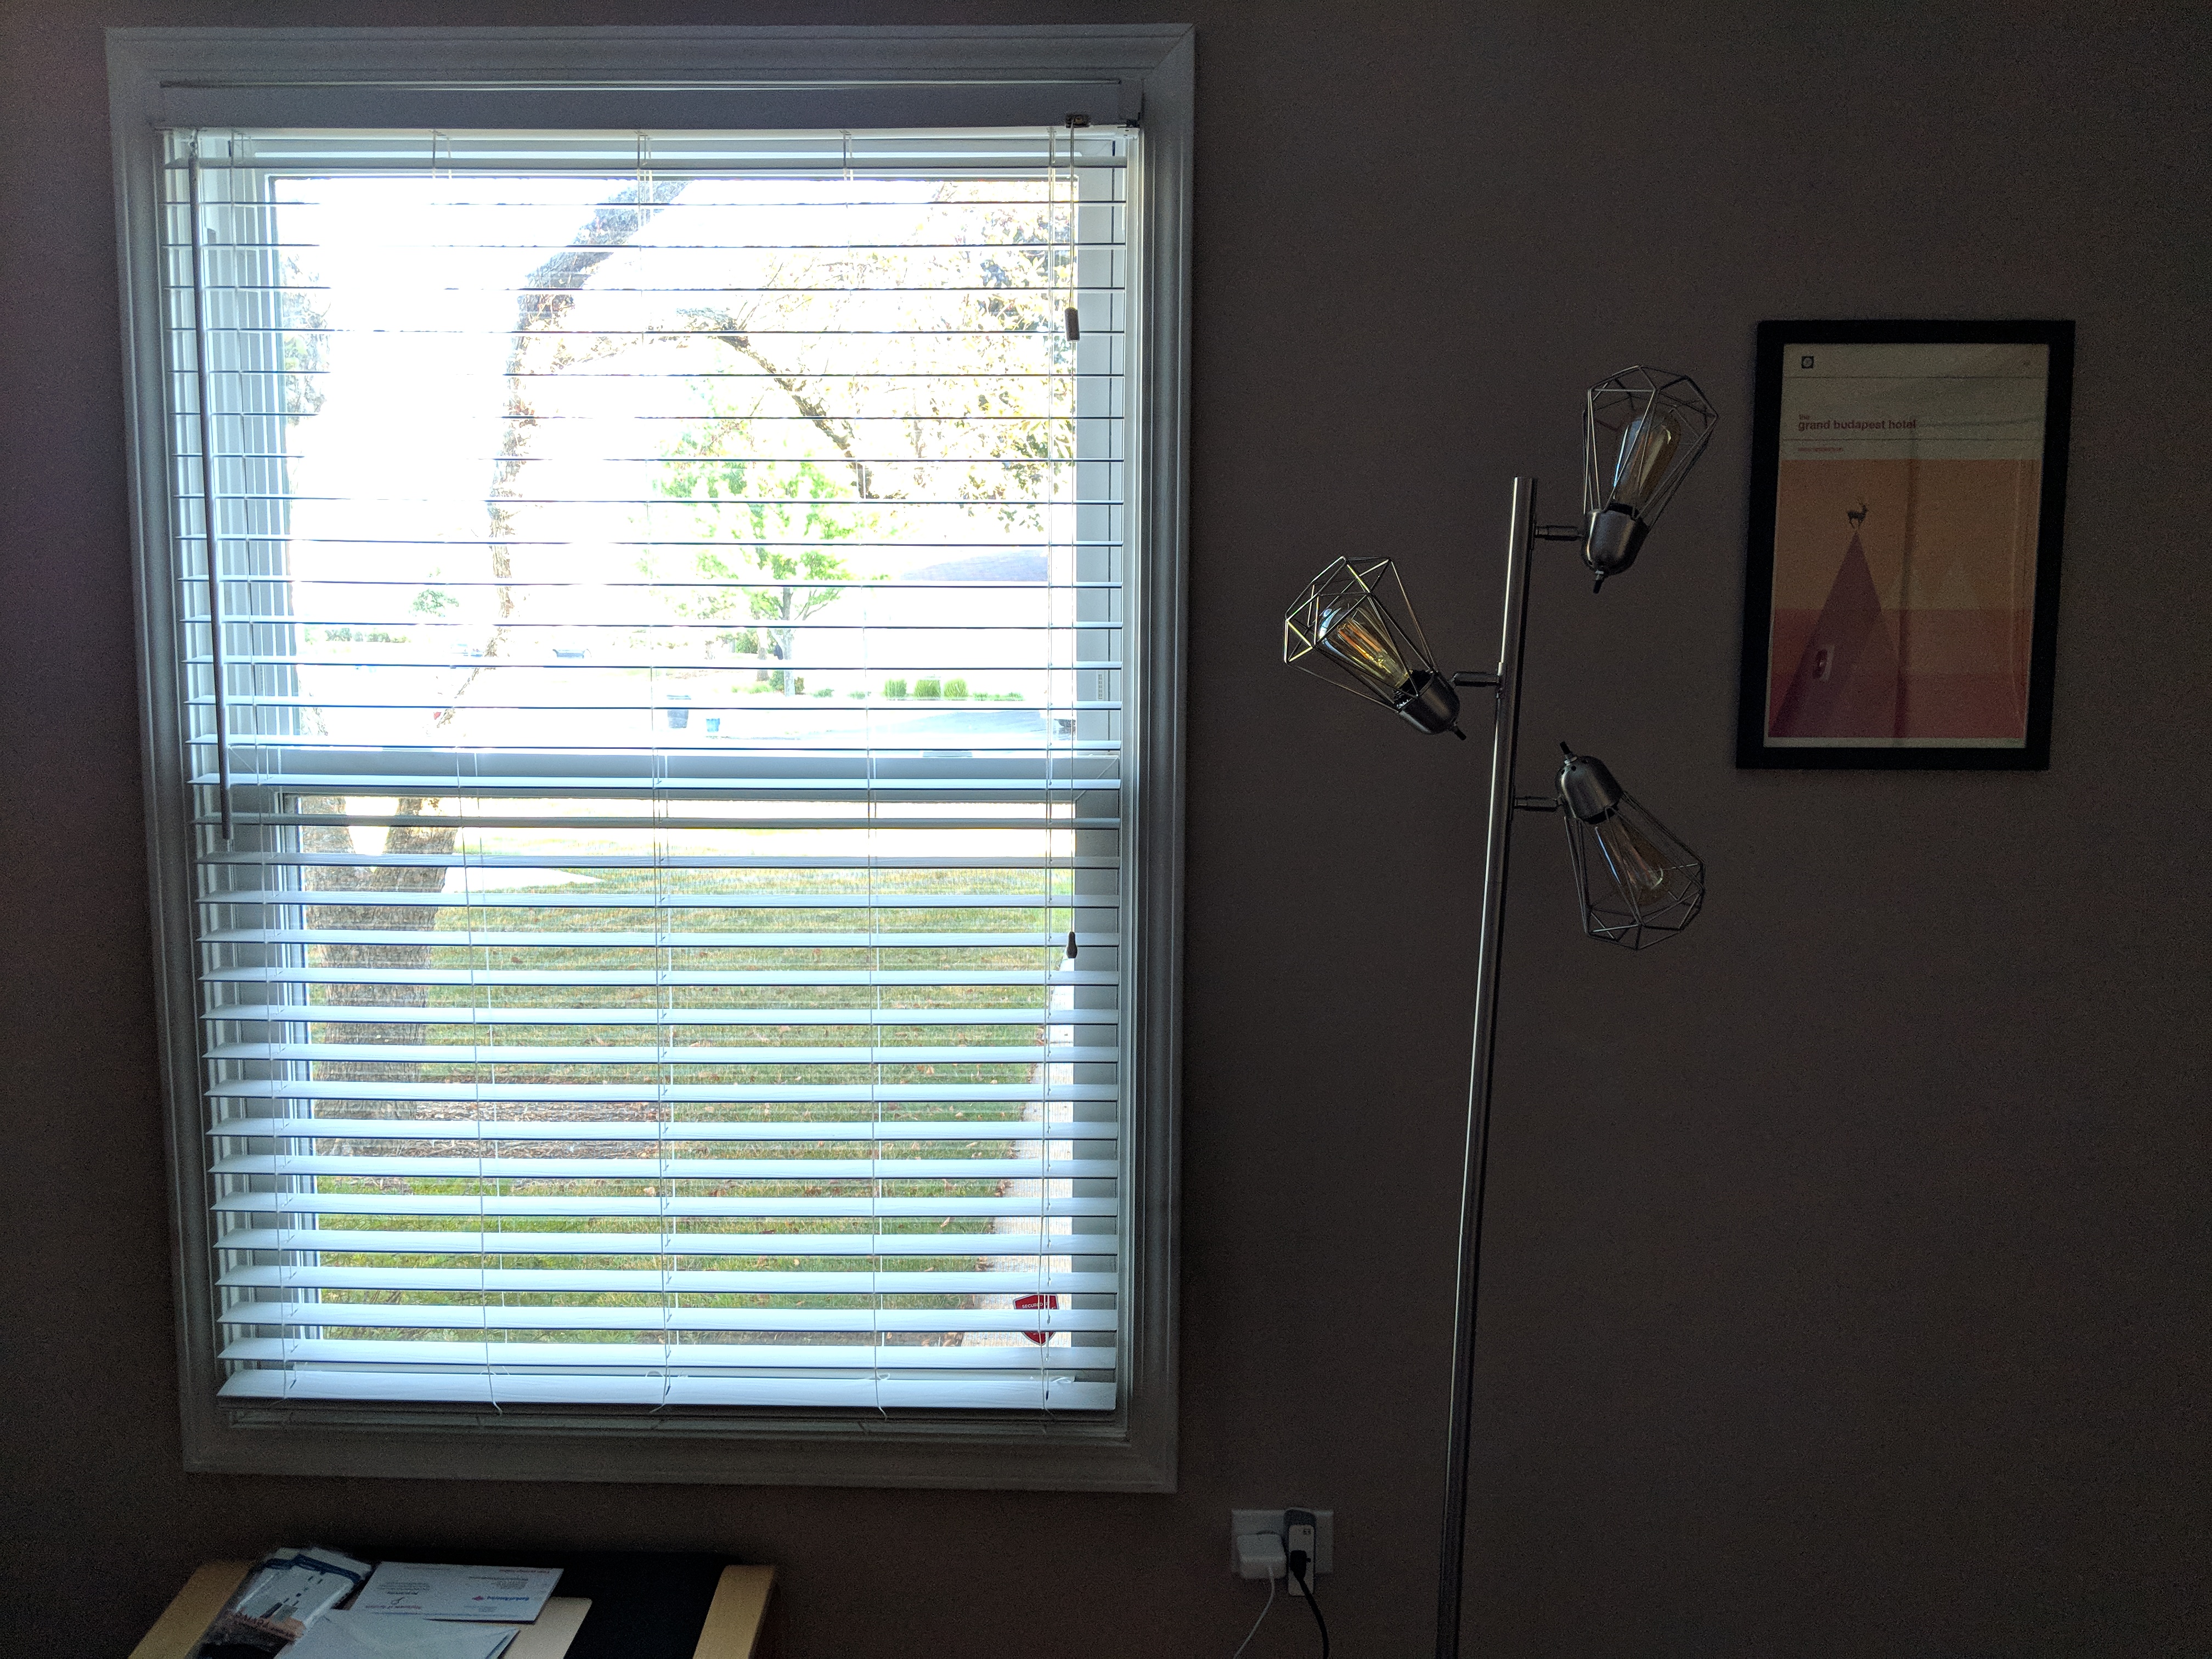
What camera comparison on BirchTree would be complete without including the Pixel 2? I’m actually quite happy with this shot and think it’s a marked improvement over the iPhone’s stock camera. This is also using the Pixel’s stock camera app and this really shows off Google’s excellent HDR processing.
The outside is a little more blown out than I’d like, but it’s way better than the iPhone. Meanwhile, the interior is dark, but has less noise than you’d expect. This also shows off the notably colder color temperature the Pixel defaults to than the iPhone. iPhone shots tend to be warmer overall, while Pixel shots look cooler1.
Takeaway
The big takeaway for me is that I plan on happily taking RAW photos for the foreseeable future. The flexibility I get in editing images, especially tough HDR shots, is invaluable and is something I don’t want to lose.
For an even more explicit demo of how much data is lost when shooting in a non-RAW format, check out the video in this tweet.
https://twitter.com/mattbirchler/status/1024638600133206017
- Temperature-wise, at least. ↩
